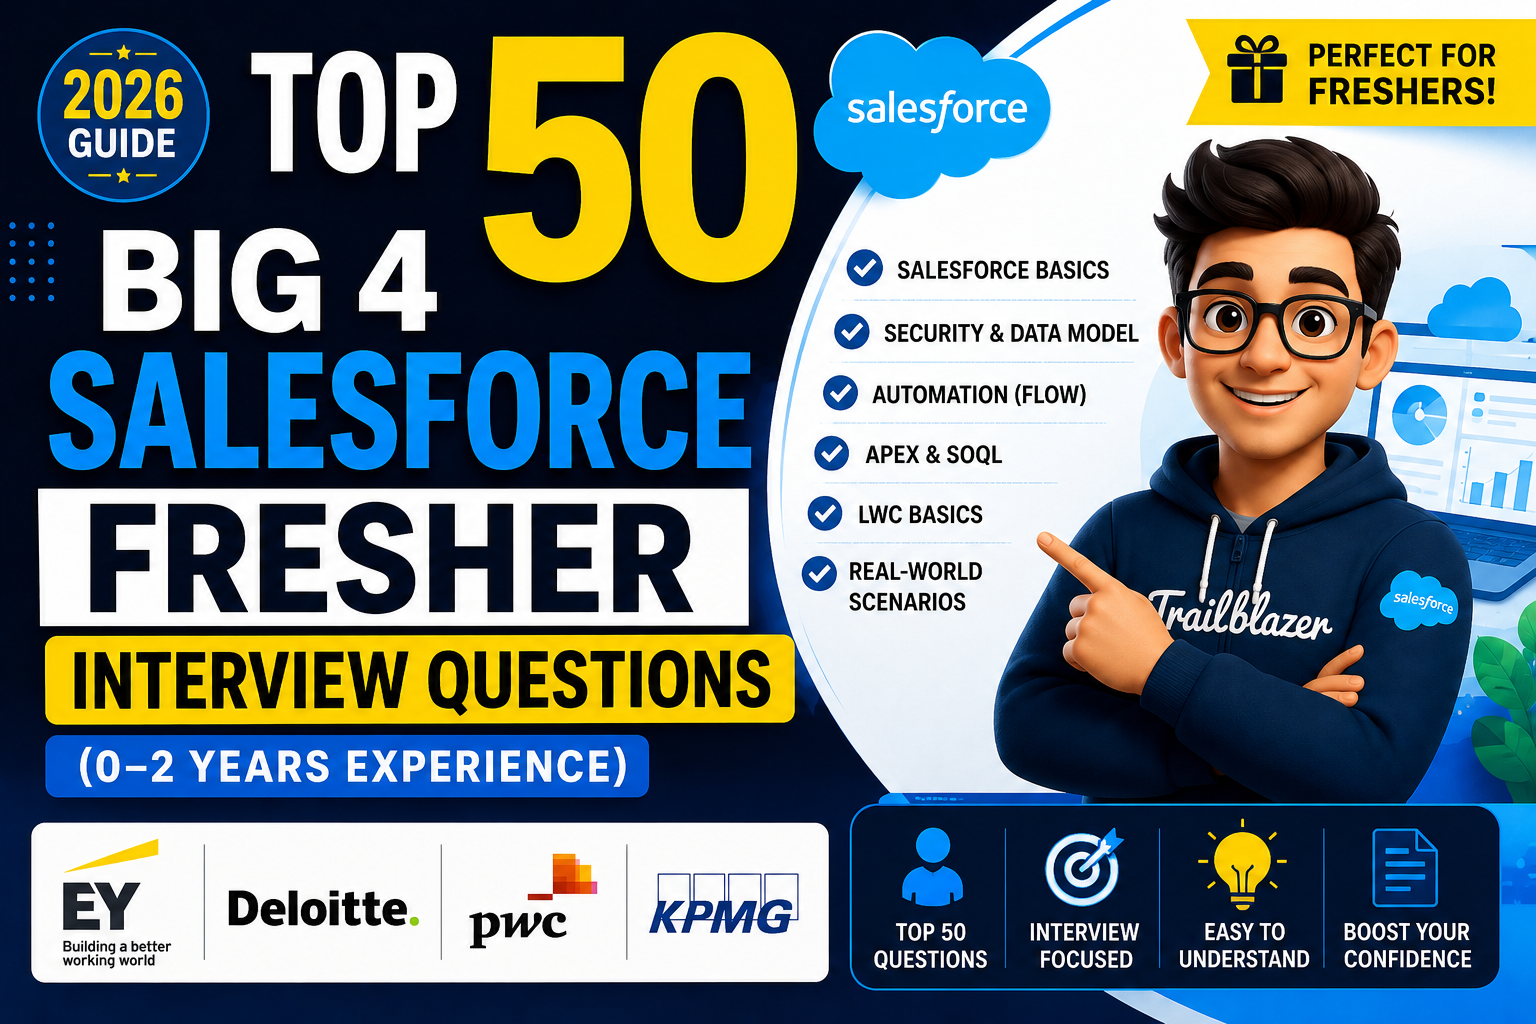
EY Salesforce Interview – Top 5 Questions with Detailed Answers (3–8 Years Experience)
1. Explain a Salesforce implementation you worked on from requirement gathering to deployment.
Answer
One of the projects I worked on was implementing a complete Sales Cloud solution for a manufacturing company that wanted to replace its legacy CRM.
Step 1: Requirement Gathering
The project started with multiple meetings involving business users, sales managers, product owners, and technical architects.
During requirement gathering, we discussed:
- Current business process
- Existing pain points
- Future business goals
- Security requirements
- Reporting requirements
- Integration requirements
We documented everything using user stories and acceptance criteria.
Example:
As a Sales Manager, I want every opportunity above $100,000 to require director approval before moving to Closed Won.
Step 2: Solution Design
Based on the requirements, we designed:
- Custom Objects
- Custom Fields
- Record Types
- Page Layouts
- Validation Rules
- Approval Processes
- Flows
- Apex Classes (where Flow limitations existed)
We also created an ER Diagram and Solution Design Document.
Step 3: Development
Development followed Agile methodology.
Tasks included:
- Creating custom objects
- Building Record Triggered Flows
- Apex Triggers
- LWC Components
- REST Integrations
- Permission Sets
- Reports & Dashboards
We maintained all development in Git using feature branches.
Step 4: Testing
Testing included:
- Unit Testing
- Integration Testing
- UAT
- Regression Testing
Apex code coverage was maintained above 85%.
Step 5: Deployment
Deployment process:
Sandbox → UAT → Production
Deployment tools:
- Salesforce DX
- Git
- Azure DevOps Pipeline
Deployment included:
- Metadata Validation
- Deployment
- Smoke Testing
- Post Deployment Verification
Challenges
- Duplicate records
- Data migration errors
- User adoption
- Performance optimization
Result
The implementation reduced manual effort by nearly 45%, improved sales visibility, and shortened lead-to-opportunity conversion time significantly.
Interview Tip
Interviewers want to understand your real project experience.
Always answer in this order:
Requirement → Design → Development → Testing → Deployment → Challenges → Result
2. How would you optimize Apex code that is hitting governor limits?
Answer
Governor limits are Salesforce’s way of ensuring fair resource usage in a multi-tenant environment.
Whenever I notice governor limit issues, I follow a systematic optimization approach.
Step 1: Identify the Governor Limit
Common limits include:
- SOQL Queries (100)
- DML Statements (150)
- CPU Time
- Heap Size
- Query Rows
- Callouts
I first review debug logs to identify the exact limit being exceeded.
Step 2: Bulkify the Code
Instead of processing one record at a time, process all records together.
Bad Example
for(Account acc : Trigger.new){
    Contact c = [SELECT Id FROM Contact WHERE AccountId=:acc.Id];
}
Good Example
Set<Id> accountIds = new Set<Id>();

for(Account acc : Trigger.new){
    accountIds.add(acc.Id);
}

Map<Id, List<Contact>> contacts =
new Map<Id,List<Contact>>();
Only one SOQL query is executed.
Step 3: Avoid SOQL inside Loops
One of the biggest interview topics.
Instead of
for(...)
{
   SELECT ...
}
Use
SELECT ... WHERE Id IN :IdsStep 4: Reduce DML Operations
Instead of:
update account;
update contact;
update opportunity;
Collect records and perform one bulk update.
Step 5: Use Collections
Collections improve performance.
Use:
- Map
- Set
- List
instead of repeated database queries.
Step 6: Move Heavy Processing
If processing thousands of records:
Move logic into
- Queueable Apex
- Batch Apex
instead of synchronous processing.
Step 7: Avoid Nested Loops
Bad
Accounts × ContactsGood
Use Maps for O(1) lookup.
Step 8: Optimize Queries
Only query required fields.
Bad
SELECT *Good
SELECT Name, IndustryReal Example
We had a trigger updating Opportunity records after Account changes.
Initially:
- SOQL inside loop
- DML inside loop
- CPU timeout
After optimization:
- Single SOQL
- Maps
- Bulk update
- Queueable processing
CPU usage reduced significantly, and governor limit exceptions were eliminated.
Interview Tip
Always mention:
- Bulkification
- Collections
- One SOQL
- One DML
- Queueable/Batch
- Debug Logs
These are the keywords interviewers expect.
3. What is the difference between Sharing Rules, Role Hierarchy, and Manual Sharing? When would you use each?
Answer
Salesforce provides multiple mechanisms to control record-level access. The choice depends on whether access should be automatic, based on organizational structure, or granted to an individual.
1. Role Hierarchy
Purpose: Automatically grants record access upward through the management hierarchy.
How it works:
- Users higher in the hierarchy inherit access to records owned by users below them.
- This is ideal for managers who need visibility into their team’s data.
Example:
A Sales Executive owns an Opportunity. Their Sales Manager and Regional Director automatically gain access through the role hierarchy.
Use when:
- Managers need visibility into subordinate records.
- Access follows the organization’s reporting structure.
2. Sharing Rules
Purpose: Automatically extend access to users or groups outside the role hierarchy.
Types:
- Owner-based sharing rules
- Criteria-based sharing rules
Example:
Share all Opportunities with Stage = Negotiation with the Finance team so they can review upcoming deals.
Use when:
- Cross-functional teams require access.
- Access is based on record ownership or business criteria.
3. Manual Sharing
Purpose: Grant access to a specific user for a specific record.
How it works:
- Record owner (or someone with sufficient permissions) manually shares the record.
Example:
A salesperson temporarily shares a single Opportunity with a colleague who is helping close the deal.
Use when:
- Access is temporary.
- Only one or a few records need to be shared.
Comparison Table
| Feature | Role Hierarchy | Sharing Rules | Manual Sharing |
|---|---|---|---|
| Access Type | Automatic | Automatic | Manual |
| Based On | Organizational hierarchy | Ownership or criteria | Individual record |
| Best For | Managers | Cross-team collaboration | Temporary or exceptional access |
| Maintenance | Low | Medium | High (manual effort) |
Interview Tip
Start by mentioning that Organization-Wide Defaults (OWD) establish the baseline level of access. Then explain that Role Hierarchy, Sharing Rules, and Manual Sharing are mechanisms to open up access beyond the OWD as business needs require.
4. How do you handle asynchronous processing in Salesforce? Compare Future, Queueable, Batch, and Scheduled Apex.
Answer
Asynchronous Apex allows long-running or resource-intensive processes to execute in the background, improving user experience and helping stay within synchronous governor limits.
1. Future Apex
Purpose:
Execute simple asynchronous operations, especially callouts.
Characteristics:
- Annotated with
@future - Accepts only primitive data types
- Cannot be chained
Use case:
Updating an external system after a record is saved.
2. Queueable Apex
Purpose:
Handle more complex asynchronous processing.
Advantages:
- Accepts complex objects
- Supports job chaining
- Easier to monitor with job IDs
Use case:
Process large sets of related records or perform sequential asynchronous tasks.
3. Batch Apex
Purpose:
Process very large data volumes.
Characteristics:
- Breaks records into manageable batches (default 200 records)
- Implements
Database.Batchable - Includes
start(),execute(), andfinish()methods
Use case:
Nightly updates to hundreds of thousands of records.
4. Scheduled Apex
Purpose:
Run Apex automatically at a specified date and time.
Characteristics:
- Implements
Schedulable - Often used to launch Batch Apex
Use case:
Run data cleanup every Sunday at midnight.
Comparison Table
| Feature | Future | Queueable | Batch | Scheduled |
|---|---|---|---|---|
| Best For | Simple async tasks | Complex async jobs | Large data processing | Time-based execution |
| Supports Chaining | No | Yes | Via finish() | Can invoke Batch/Queueable |
| Accepts Complex Types | No | Yes | Yes | Yes |
| Callouts | Yes | Yes | Yes | Yes (through invoked logic) |
| Typical Volume | Small | Medium | Very Large | Depends on invoked process |
Real Project Example
In one implementation, whenever an Opportunity was marked as Closed Won, Salesforce needed to send order details to an external ERP system.
We used:
- A Record-Triggered Flow to detect the status change.
- Queueable Apex to perform the REST API callout.
- Retry logic for temporary failures.
- Scheduled Apex to retry failed integrations overnight.
This kept the user experience fast while ensuring reliable integration.
Interview Tip
A simple way to remember:
- Future → Simple background task
- Queueable → Complex background task with chaining
- Batch → Massive data processing
- Scheduled → Run at a specific time
5. Describe a complex integration you implemented with an external system and the challenges you faced.
Answer
In one project, Salesforce had to integrate with an external ERP system to synchronize customer orders in near real time.
Business Requirement
Whenever an Opportunity was marked as Closed Won, Salesforce needed to:
- Create an Order in the ERP.
- Receive the ERP Order Number.
- Update Salesforce with the confirmation status.
The integration had to be reliable, secure, and scalable.
Solution Design
We implemented a REST-based integration using:
- Named Credentials for secure authentication.
- Apex callouts for communication.
- Queueable Apex for asynchronous execution.
- Custom logging object to capture request and response details.
Integration Flow
- User marks Opportunity as Closed Won.
- Record-Triggered Flow invokes Apex.
- Queueable Apex prepares the JSON payload.
- Apex sends a REST callout to the ERP.
- ERP returns the Order ID and status.
- Salesforce updates the Opportunity and related Order record.
- Any errors are written to a custom Integration Log object for monitoring and retry.
Challenges Faced
1. API Timeouts
The ERP occasionally responded slowly.
Solution: Moved the callout to Queueable Apex and implemented retry logic for transient failures.
2. Authentication Token Expiry
Access tokens expired periodically.
Solution: Used Named Credentials with OAuth to automate token management.
3. Duplicate Requests
Users sometimes updated the same record multiple times.
Solution: Added idempotency checks and stored external transaction IDs to prevent duplicate order creation.
4. Error Handling
Network issues or API errors could leave records out of sync.
Solution: Logged request/response details in a custom object, sent notifications to support, and scheduled retry jobs for recoverable failures.
Result
The integration processed thousands of orders reliably, reduced manual order entry, improved data accuracy, and provided complete traceability for troubleshooting.
Interview Tip
When discussing integrations, structure your answer as:
- Business requirement
- Architecture
- Technologies used
- Security approach
- Challenges
- Solutions
- Business outcome
Deloitte Salesforce Interview – Top 5 Questions with Detailed Answers (3–8 Years Experience)
1. How do you design a scalable Salesforce solution for an enterprise with millions of records?
Answer
When designing a Salesforce solution for an enterprise with millions of records, scalability should be considered from the beginning rather than as an afterthought. A well-designed solution should continue to perform efficiently as the amount of data, number of users, and business processes grow over time.
In one of my enterprise projects, the organization had millions of Account, Contact, Opportunity, and Case records, with thousands of users accessing Salesforce daily. The goal was to maintain high performance while ensuring security, maintainability, and future scalability.
Step 1: Understand Business Requirements
The first step is to gather both functional and non-functional requirements.
Functional requirements include:
- Business processes
- User roles
- Automation needs
- Reporting requirements
- Integration requirements
Non-functional requirements include:
- Expected data volume
- Concurrent users
- Response time
- Availability
- Security
- Future growth
Understanding these requirements helps determine whether standard Salesforce features are sufficient or whether custom development is needed.
Step 2: Design an Efficient Data Model
The data model should remain as simple as possible.
I generally:
- Use standard objects whenever possible
- Create custom objects only when required
- Avoid unnecessary relationships
- Use lookup relationships instead of master-detail when ownership independence is needed
- Archive historical data when it is no longer actively used
A clean data model improves query performance and simplifies maintenance.
Step 3: Follow Salesforce Large Data Volume (LDV) Best Practices
When working with millions of records:
- Use indexed fields in filters
- Create selective SOQL queries
- Avoid full table scans
- Use skinny tables only when recommended by Salesforce Support
- Use custom indexes for frequently searched fields
- Archive or purge old data regularly
Example:
Instead of querying all Opportunities,
SELECT Id FROM OpportunityI always filter using indexed fields such as:
SELECT Id
FROM Opportunity
WHERE LastModifiedDate = THIS_YEAR
This significantly improves query performance.
Step 4: Build Scalable Automation
Rather than placing all business logic inside triggers, I separate responsibilities.
Typical architecture:
- Record-Triggered Flow
- Apex Trigger
- Trigger Handler
- Service Layer
- Utility Classes
This architecture improves readability, testability, and future enhancements.
Step 5: Design Efficient Integrations
Large enterprises usually integrate Salesforce with multiple systems.
Best practices include:
- REST APIs
- Platform Events
- Change Data Capture
- Queueable Apex
- Bulk API for large data synchronization
Avoid synchronous integrations whenever possible.
Step 6: Optimize Sharing Model
Sharing calculations become expensive with millions of records.
I generally:
- Keep Organization-Wide Defaults as restrictive as business allows
- Use Role Hierarchy appropriately
- Avoid excessive Sharing Rules
- Use Apex Managed Sharing only when necessary
A simpler sharing model results in faster recalculations.
Step 7: Performance Optimization
Performance improvements include:
- Pagination
- Lazy loading
- Lightning Data Service
- Cacheable Apex methods
- Indexed filters
- Optimized SOQL
Step 8: Deployment Strategy
For enterprise implementations, deployment usually follows:
Developer Sandbox
↓
Integration Sandbox
↓
Full Sandbox
↓
UAT
↓
Production
Deployment tools:
- Salesforce DX
- Git
- Azure DevOps
- GitHub Actions
- Copado
Challenges Faced
During one implementation:
- Query timeout due to non-selective SOQL
- Slow reports
- Sharing recalculation delays
Solutions:
- Added custom indexes
- Archived historical records
- Optimized sharing rules
- Introduced Queueable Apex for background processing
Result
The redesigned solution successfully supported millions of records while maintaining acceptable response times, improving report performance, and reducing maintenance overhead.
Interview Tip
When answering enterprise design questions, always mention:
- Large Data Volume (LDV)
- Selective Queries
- Indexes
- Bulkification
- Queueable/Batch Apex
- Security
- Scalability
- Performance Optimization
These keywords demonstrate enterprise-level Salesforce experience.
2. Explain your approach to writing bulkified Apex triggers.
Answer
Apex triggers should always be designed to process multiple records efficiently because Salesforce executes triggers in bulk during imports, integrations, and batch operations.
My goal is to ensure that the trigger works correctly whether one record or 200 records are processed.
Step 1: One Trigger Per Object
I always follow the one-trigger-per-object pattern.
Example:
AccountTriggerAll logic is delegated to a Trigger Handler class.
Benefits:
- Easier maintenance
- Better readability
- Easier testing
Step 2: Trigger Handler Pattern
Instead of writing business logic directly inside the trigger:
Trigger
↓
Handler
↓
Service Layer
↓
Utility Classes
This keeps the code modular and reusable.
Step 3: Process Collections
Never process one record at a time.
Instead:
- Trigger.new
- Trigger.oldMap
- Set
- Map
- List
Step 4: Avoid SOQL Inside Loops
Bad Example
for(Account acc : Trigger.new){
    Contact c = [
        SELECT Id
        FROM Contact
        WHERE AccountId=:acc.Id
    ];
}
This executes one query for every record.
Good Example
Set<Id> accountIds = new Set<Id>();

for(Account acc : Trigger.new){
    accountIds.add(acc.Id);
}

List<Contact> contacts = [
SELECT Id, AccountId
FROM Contact
WHERE AccountId IN :accountIds
];
Only one SOQL query is executed.
Step 5: Avoid DML Inside Loops
Instead of:
update account;inside a loop,
collect records first.
Finally execute:
update accountList;Step 6: Prevent Recursion
Triggers may fire multiple times.
Solutions:
- Static Boolean
- Static Set
- Framework-based recursion control
Step 7: Handle Exceptions
Use try-catch blocks only where appropriate and log meaningful errors.
Real Example
During an Account update,
we needed to update all related Opportunities.
Old implementation:
- SOQL inside loop
- Update inside loop
Result:
Governor Limit Exception
New implementation:
- Single query
- Map
- Bulk update
Result:
Processed thousands of records successfully.
Interview Tip
Always mention these six words:
- Bulkification
- Collections
- Maps
- Single SOQL
- Single DML
- Trigger Handler Framework
3. How do you secure sensitive customer data in Salesforce?
Answer
Securing customer data is one of the most important responsibilities of a Salesforce developer. My approach follows the principle of least privilege, ensuring that users have only the access they need to perform their job.
Step 1: Authentication
Ensure users authenticate securely by using:
- Multi-Factor Authentication (MFA)
- Single Sign-On (SSO) where appropriate
- Strong password policies
- Login IP restrictions
- Login hour restrictions
Step 2: Organization-Wide Defaults (OWD)
I start by configuring the most restrictive Organization-Wide Defaults possible.
Example:
- Accounts: Private
- Opportunities: Private
- Cases: Private
Access is then expanded only where required.
Step 3: Role Hierarchy
Managers automatically gain access to records owned by their team through the role hierarchy, reducing the need for manual sharing.
Step 4: Sharing Rules
For cross-functional collaboration, I use owner-based or criteria-based sharing rules to grant access without exposing unnecessary data.
Step 5: Profiles and Permission Sets
I follow a least-privilege model:
- Profiles define baseline access.
- Permission Sets grant additional permissions only when needed.
- Permission Set Groups simplify administration.
Step 6: Field-Level Security (FLS)
Sensitive fields such as Salary, PAN, Aadhaar, or Bank Account Number should be hidden from users who do not need them.
FLS ensures users cannot view or edit protected fields.
Step 7: Shield Platform Encryption (if licensed)
For highly sensitive information, I recommend encrypting data at rest using Salesforce Shield Platform Encryption while considering its impact on search and integrations.
Step 8: Secure Custom Development
When writing Apex:
- Enforce sharing with
with sharingwhere appropriate. - Respect CRUD and FLS checks before performing DML or queries.
- Avoid exposing sensitive information in debug logs.
- Validate and sanitize inputs.
Step 9: Monitoring and Auditing
Regularly review:
- Setup Audit Trail
- Login History
- Field History Tracking
- Event Monitoring (if available)
These help detect unauthorized access and support compliance.
Real Example
In a financial services project, customer tax identifiers and bank details were stored in Salesforce. We implemented private OWDs, restricted FLS, encrypted sensitive fields, and added audit logging. This ensured compliance with internal security policies while allowing authorized users to perform their work efficiently.
Interview Tip
Structure your answer from broadest to most specific:
- Authentication
- OWD
- Role Hierarchy
- Sharing Rules
- Profiles & Permission Sets
- Field-Level Security
- Encryption
- Secure Apex
- Auditing
4. Describe a complex Record-Triggered Flow you built and why you chose Flow over Apex.
Answer
One project involved automating the approval process for high-value Opportunities.
Business Requirement
Whenever an Opportunity met all of the following conditions:
- Stage changed to Proposal/Price Quote
- Amount exceeded ₹50 lakh
- Discount exceeded the approved threshold
the system had to:
- Create an approval request
- Notify the Sales Director
- Create follow-up tasks
- Send an email to Finance
- Update related records
Flow Design
The Record-Triggered Flow executed after save because related records needed to be created.
The flow included:
- Entry conditions to minimize unnecessary executions.
- Decision elements to evaluate approval criteria.
- Get Records to retrieve approval settings.
- Create Records to generate approval tasks.
- Update Records to set Opportunity status.
- Email Alert actions for notifications.
- Fault paths for centralized error handling.
Why Flow Instead of Apex?
I chose Flow because:
- The logic was largely declarative and business users wanted visibility into the process.
- No complex looping or advanced algorithms were required.
- Maintenance was easier for administrators.
- Future changes could be made without modifying code.
If the solution had required advanced calculations, sophisticated error recovery, or heavy asynchronous processing, I would have considered Apex instead.
Challenges
One challenge was preventing duplicate approvals when users edited the Opportunity multiple times.
Solution: Added entry criteria and decision logic so the flow only executed when the approval status changed from a non-approved state.
Result
The automation eliminated manual approval emails, reduced processing time, and gave business users a transparent workflow that administrators could maintain without code changes.
Interview Tip
When discussing a Flow, explain:
- Business requirement
- Flow type
- Main elements used
- Why Flow was chosen
- Challenges
- Business outcome
5. How do you troubleshoot performance issues in Lightning Web Components (LWC)?
Answer
When troubleshooting performance in Lightning Web Components, I first identify whether the bottleneck is on the client side, server side, or the network. Rather than making assumptions, I use browser developer tools, Salesforce debugging tools, and code reviews to isolate the issue.
Step 1: Identify the Bottleneck
I check:
- Slow page rendering
- Delayed server responses
- Excessive Apex calls
- Large data payloads
- JavaScript execution time
Browser Developer Tools and the Network tab are useful for identifying slow requests.
Step 2: Optimize Server Calls
Avoid unnecessary Apex calls.
Best practices:
- Use
@wirewhen appropriate. - Mark read-only Apex methods as
@AuraEnabled(cacheable=true). - Retrieve only the fields required.
- Combine related requests when practical.
Step 3: Reduce Component Re-renders
Frequent re-rendering affects performance.
I:
- Avoid unnecessary tracked state changes.
- Update only the data that changed.
- Minimize expensive computations during rendering.
Step 4: Handle Large Data Efficiently
Instead of loading thousands of records at once:
- Implement pagination or infinite scrolling.
- Load data on demand.
- Use lazy loading for secondary content.
Step 5: Optimize JavaScript
Keep JavaScript efficient by:
- Breaking large functions into reusable methods.
- Avoiding unnecessary loops.
- Using Maps and Sets where appropriate.
- Removing unused code and event listeners.
Step 6: Improve User Experience
While data is loading:
- Display spinners or skeleton screens.
- Show meaningful error messages.
- Prevent duplicate user actions during processing.
Real Example
A dashboard component was taking nearly 10 seconds to load because it called multiple Apex methods sequentially and retrieved unnecessary fields.
We optimized it by:
- Consolidating server calls.
- Using cacheable Apex for read-only data.
- Querying only required fields.
- Implementing lazy loading for less frequently used sections.
The page load time was reduced significantly, resulting in a much smoother user experience.
Interview Tip
A structured troubleshooting approach makes a strong impression:
- Identify the bottleneck.
- Analyze browser and Salesforce logs.
- Optimize Apex and SOQL.
- Reduce network requests.
- Minimize re-rendering.
- Test again and measure improvements.
PwC Salesforce Interview – Top 5 Questions with Detailed Answers (3–8 Years Experience)
1. Explain the complete Salesforce deployment process you follow across environments.
Answer
A successful Salesforce deployment is much more than moving metadata from one environment to another. It requires careful planning, thorough testing, version control, and a well-defined release strategy to minimize production risks.
In the enterprise projects I’ve worked on, we followed a structured deployment process using Agile methodology, Git-based version control, and CI/CD pipelines. The objective was to ensure every release was reliable, traceable, and easy to roll back if necessary.
Step 1: Requirement Analysis
Every deployment starts with understanding the business requirement.
During this phase, we:
- Discuss requirements with stakeholders
- Prepare user stories
- Define acceptance criteria
- Estimate development effort
- Identify dependencies
- Plan release timelines
Proper planning helps avoid deployment conflicts later in the project.
Step 2: Development in Sandbox
Developers work in individual Developer Sandboxes.
Development includes:
- Custom Objects
- Custom Fields
- Apex Classes
- Apex Triggers
- Lightning Web Components
- Flows
- Validation Rules
- Permission Sets
- Reports and Dashboards
All changes are committed to Git using feature branches.
Example:
feature/opportunity-approval
feature/account-integration
bugfix/contact-validation
Step 3: Code Review
Before merging code, every pull request is reviewed.
The review checks:
- Code readability
- Governor limit compliance
- Bulkification
- Naming conventions
- Security
- Test coverage
- Best practices
Peer reviews help catch issues early and maintain consistent coding standards.
Step 4: Unit Testing
Developers execute:
- Apex Test Classes
- Positive Test Cases
- Negative Test Cases
- Boundary Testing
The goal is not just to achieve the minimum 75% code coverage but to ensure meaningful test coverage for business logic.
Step 5: Integration Testing
Changes are deployed to an Integration Sandbox where multiple features are tested together.
Testing includes:
- Flow execution
- Apex
- LWC functionality
- API integrations
- Validation Rules
- Approval Processes
This phase verifies that components work correctly together.
Step 6: User Acceptance Testing (UAT)
Business users validate the solution in the UAT environment.
They confirm:
- Functional requirements
- Business processes
- Reports
- Dashboards
- User interface
- Security
Only after business approval is the solution considered ready for production.
Step 7: Production Deployment
Deployment is typically performed during an approved release window.
Common deployment tools include:
- Salesforce DX
- Change Sets (for smaller projects)
- ANT Migration Tool
- Copado
- Gearset
- Azure DevOps
- GitHub Actions
Deployment activities include:
- Metadata Validation
- Production Deployment
- Data Migration (if required)
- Smoke Testing
- Post-deployment Verification
Step 8: Post-Deployment Monitoring
Even after deployment, monitoring is critical.
Typical activities include:
- Validate integrations
- Monitor Apex Jobs
- Review Debug Logs
- Check Scheduled Jobs
- Verify Reports
- Monitor User Issues
Quick issue resolution helps maintain business continuity.
Challenges Faced
In one project, a deployment failed because a Flow referenced a custom field that wasn’t included in the deployment package.
Solution:
- Identified the missing dependency.
- Added the required metadata.
- Revalidated the deployment.
- Successfully deployed without impacting production users.
Result
Following a structured deployment process reduced production issues, improved release quality, and ensured predictable deployments across multiple environments.
Interview Tip
Always explain the deployment lifecycle in this order:
Requirement Gathering
↓
Development
↓
Code Review
↓
Testing
↓
Integration Testing
↓
UAT
↓
Production Deployment
↓
Post-Deployment Support
2. How do you handle exception logging and error handling in Apex?
Answer
Effective error handling is essential in enterprise Salesforce applications because it helps identify issues quickly, improves system reliability, and simplifies troubleshooting.
My approach is to handle exceptions gracefully, log sufficient details for investigation, and ensure users receive meaningful messages instead of technical errors.
Step 1: Use Try-Catch Blocks
I wrap code that may fail, such as DML operations or callouts, in try-catch blocks.
Example:
try {
    update accounts;
} catch (DmlException ex) {
    // Log exception
}
This prevents unhandled exceptions from crashing the transaction.
Step 2: Catch Specific Exceptions
Instead of catching the generic Exception class everywhere, I handle specific exceptions when possible.
Examples:
- DmlException
- QueryException
- NullPointerException
- CalloutException
Specific handling provides better diagnostics and recovery options.
Step 3: Centralized Exception Logging
Rather than writing debug statements throughout the code, I prefer a centralized logging mechanism.
Typical fields in a custom Error Log object include:
- Exception Type
- Error Message
- Apex Class
- Method Name
- Stack Trace
- Record Id
- User
- Timestamp
This creates a searchable audit trail for support teams.
Step 4: Avoid Exposing Technical Errors
Users should not see raw exception messages.
Instead of displaying:
System.NullPointerException
I show user-friendly messages such as:
“An unexpected error occurred while processing your request. Please contact your administrator if the issue persists.”
Step 5: Log Integration Failures
For REST or SOAP integrations, I also log:
- Request payload
- Response payload
- HTTP Status Code
- Endpoint
- Retry status
This makes troubleshooting much easier.
Step 6: Retry Recoverable Errors
For temporary issues such as network failures or API timeouts, I use Queueable Apex or Scheduled Apex to retry failed operations instead of requiring manual intervention.
Real Example
In one project, Salesforce sent customer information to an external billing system.
Occasionally, the billing API returned HTTP 503 (Service Unavailable).
Our solution:
- Catch the
CalloutException - Log the request and response
- Store the failed transaction
- Retry automatically using Scheduled Apex
- Notify the support team if retries continued to fail
This improved reliability without disrupting users.
Interview Tip
A complete answer should mention:
- Try-Catch
- Specific Exceptions
- Custom Logging
- User-Friendly Messages
- Integration Logging
- Retry Mechanism
- Monitoring
3. Describe a scenario where you integrated Salesforce with a third-party REST API.
Answer
One of the integrations I implemented involved synchronizing Salesforce Opportunities with an external Order Management System.
Business Requirement
Whenever an Opportunity reached the Closed Won stage:
- Create an order in the external system.
- Receive the external Order ID.
- Update Salesforce with the confirmation.
- Log any failures for future retries.
Architecture
The solution included:
- Record-Triggered Flow
- Apex Trigger Handler
- Queueable Apex
- Named Credentials
- REST API
- Custom Integration Log object
Process Flow
- Opportunity is marked Closed Won.
- Flow invokes Queueable Apex.
- Queueable Apex prepares the JSON payload.
- Salesforce authenticates using Named Credentials.
- A REST call is sent to the external system.
- The response returns the external Order ID.
- Salesforce updates the Opportunity.
- Errors are logged and retried if necessary.
Challenges
API Timeouts
The external service occasionally responded slowly.
Solution: Used Queueable Apex to execute the callout asynchronously.
Duplicate Orders
Users sometimes edited the Opportunity multiple times.
Solution: Stored the external Order ID and validated it before sending another request.
Authentication
The external API used OAuth authentication.
Solution: Configured Named Credentials to manage token refresh automatically.
Monitoring
Created a custom Integration Log object that stored:
- Request payload
- Response payload
- Status Code
- Error Message
- Retry Count
Result
The integration automated order creation, eliminated manual data entry, improved data accuracy, and reduced processing time while providing full visibility into integration failures.
Interview Tip
Structure your answer as:
- Business requirement
- Architecture
- Authentication
- Process flow
- Challenges
- Solutions
- Business outcome
4. What strategies do you use to improve SOQL query performance?
Answer
Efficient SOQL queries are critical for maintaining application performance, especially in organizations with large data volumes.
When optimizing SOQL, my focus is on reducing the amount of data scanned and retrieved.
Strategy 1: Write Selective Queries
Always filter using indexed fields whenever possible.
Examples include:
- Id
- Name (where appropriate)
- External ID
- Lookup fields
- Audit fields such as
CreatedDateandLastModifiedDate
Selective filters help Salesforce use indexes instead of scanning entire tables.
Strategy 2: Retrieve Only Required Fields
Avoid querying unnecessary columns.
Instead of retrieving every available field, select only those needed for the current business logic. This reduces heap usage and network overhead.
Strategy 3: Avoid SOQL Inside Loops
Never execute queries repeatedly within a loop.
Instead:
- Collect record IDs into a
Set<Id>. - Execute a single query using the
INoperator. - Store results in a
Mapfor quick access.
Strategy 4: Use Relationship Queries Wisely
When possible, retrieve parent and child data in a single query rather than issuing multiple separate queries.
This reduces database round trips.
Strategy 5: Optimize Filters
Avoid using filters that prevent indexes from being used, such as leading wildcards in LIKE clauses or broad conditions that match most records.
Strategy 6: Archive Historical Data
Large volumes of inactive records can affect performance.
Archiving or deleting obsolete data helps maintain selective queries and faster reports.
Real Example
A report component queried Opportunities without meaningful filters, causing slow performance.
We optimized it by:
- Adding indexed date filters.
- Querying only required fields.
- Replacing repeated queries with a single bulk query.
The response time improved significantly, and CPU usage decreased.
Interview Tip
Always mention:
- Selective Queries
- Indexed Fields
- Bulkification
- Maps and Sets
- Relationship Queries
- Retrieve Only Required Fields
- Large Data Volume (LDV)
5. How do you ensure code quality and maintainability in large Salesforce projects?
Answer
In large Salesforce implementations, writing code that simply works is not enough. The code should also be easy to understand, test, extend, and maintain over time by different developers.
My approach focuses on consistency, modularity, testing, and automation.
Step 1: Follow a Layered Architecture
I separate responsibilities into different layers:
- Trigger
- Trigger Handler
- Service Layer
- Selector Layer
- Utility Classes
This keeps business logic reusable and prevents duplication.
Step 2: Use Coding Standards
I follow consistent standards for:
- Class names
- Method names
- Variable names
- Comments (where they add value)
- Folder structure
Readable code reduces onboarding time for new developers.
Step 3: Write Comprehensive Unit Tests
My test classes cover:
- Positive scenarios
- Negative scenarios
- Bulk operations
- Edge cases
- Error handling
The objective is confidence in the code, not just achieving 75% coverage.
Step 4: Perform Code Reviews
Every pull request is reviewed for:
- Readability
- Governor limit compliance
- Security
- Performance
- Best practices
- Maintainability
Peer reviews improve overall code quality.
Step 5: Use Version Control and CI/CD
I use Git for source control and CI/CD pipelines to automate:
- Static code analysis
- Unit testing
- Metadata validation
- Deployments
Automation reduces manual errors and increases deployment consistency.
Step 6: Reduce Technical Debt
I regularly:
- Refactor duplicated logic.
- Remove unused code.
- Simplify complex methods.
- Keep classes focused on a single responsibility.
Continuous refactoring keeps the codebase healthy.
Step 7: Documentation
For important components, I maintain:
- Technical design documents.
- API documentation.
- Deployment notes.
- Configuration guides.
- Runbooks for support teams.
Good documentation ensures long-term maintainability.
Real Example
In one enterprise project, multiple developers had implemented similar Opportunity validation logic across several triggers.
We refactored the solution into a shared service layer, introduced a trigger framework, standardized naming conventions, and added automated code reviews in the CI/CD pipeline.
The result was a cleaner codebase, faster onboarding for new developers, fewer production defects, and easier future enhancements.
Interview Tip
When answering this question, emphasize these key principles:
- Clean Architecture
- Reusable Code
- Trigger Framework
- Unit Testing
- Code Reviews
- Version Control
- CI/CD
- Documentation
- Refactoring
KPMG Salesforce Interview – Top 5 Questions with Detailed Answers (3–8 Years Experience)
1. How would you design role-based access for multiple business units?
Answer
Designing role-based access for multiple business units is one of the most common challenges in enterprise Salesforce implementations. The objective is to ensure that users can access only the records they need while allowing collaboration where business processes require it. A well-designed security model should be scalable, easy to maintain, and aligned with the organization’s structure.
In one project, the organization had multiple business units such as Sales, Service, Finance, Marketing, and Operations. Each business unit had its own users, managers, and regional teams, but certain records needed to be shared across departments.
Step 1: Understand the Business Structure
Before configuring security, I work with business stakeholders to understand:
- Organizational hierarchy
- Business units
- User roles
- Record ownership
- Collaboration requirements
- Compliance requirements
Example:
The company had:
- Sales Department
- Customer Support
- Finance
- Marketing
- Regional Offices (North, South, East, West)
Each department had different access requirements.
Step 2: Configure Organization-Wide Defaults (OWD)
I always begin with the most restrictive Organization-Wide Defaults.
Example:
| Object | OWD |
|---|---|
| Account | Private |
| Opportunity | Private |
| Case | Private |
| Contact | Controlled by Parent |
This ensures no unnecessary access is granted by default.
Step 3: Design the Role Hierarchy
The Role Hierarchy should represent the organization’s reporting structure rather than job titles.
Example:
CEO

↓

VP Sales

↓

Regional Manager

↓

Sales Manager

↓

Sales Executive
Managers automatically gain access to records owned by their team members.
Step 4: Use Permission Sets
Profiles should provide only baseline permissions.
Additional access should be granted through Permission Sets.
Example:
Sales Executive
Base Profile
“Discount Approval Permission Set”
This avoids creating too many custom profiles.
Step 5: Configure Sharing Rules
Business units often need controlled collaboration.
Examples:
- Finance needs access to Closed Won Opportunities.
- Marketing requires access to Leads from specific campaigns.
- Customer Support needs read-only access to Accounts.
In these cases, I create:
- Owner-Based Sharing Rules
- Criteria-Based Sharing Rules
Step 6: Use Public Groups
Instead of assigning sharing rules directly to users, I create Public Groups.
Benefits:
- Easier maintenance
- Better scalability
- Simpler administration
Step 7: Field-Level Security
Sensitive fields should remain protected.
Examples:
- PAN Number
- Bank Account
- Salary
- Customer Credit Limit
Only authorized users receive visibility through Field-Level Security.
Step 8: Testing
I validate security by logging in as different users.
Typical scenarios include:
- Sales Executive
- Sales Manager
- Finance User
- Marketing User
- Customer Support User
This confirms each user sees only the intended data.
Real Project Example
A multinational organization had separate Sales teams for different regions.
Business Requirement:
- Regional users should only access their own Opportunities.
- Regional Managers should view all Opportunities within their region.
- Finance should access only Closed Won Opportunities.
- Executive leadership should view all data.
Solution:
- Private OWD
- Role Hierarchy for management visibility
- Criteria-Based Sharing Rules for Finance
- Permission Sets for special permissions
- Public Groups for simplified administration
The result was a secure and scalable sharing model that supported business growth while maintaining data confidentiality.
Interview Tip
Always explain security in this sequence:
- OWD
- Role Hierarchy
- Profiles
- Permission Sets
- Sharing Rules
- Public Groups
- Field-Level Security
- Testing
This structured approach demonstrates a strong understanding of Salesforce’s security model.
2. Explain a challenging automation you built using Flows or Apex.
Answer
One of the most challenging automations I developed was an Opportunity approval and fulfillment process for a manufacturing company. The goal was to automate multiple business steps while reducing manual intervention and ensuring compliance with approval policies.
Business Requirement
Whenever an Opportunity met all of the following conditions:
- Stage changed to Proposal/Price Quote
- Opportunity Amount exceeded ₹1 crore
- Discount was greater than the approved threshold
the system needed to:
- Route the Opportunity for approval.
- Notify the Sales Director.
- Create follow-up Tasks.
- Notify the Finance team.
- Lock the Opportunity until approval was completed.
- Update related records after approval.
Solution Design
I evaluated both Flow and Apex.
The majority of the business logic involved declarative automation, so I chose Record-Triggered Flow.
However, for complex calculations and integration with an external approval system, I invoked Apex from the Flow.
This hybrid approach combined the maintainability of Flow with the flexibility of Apex.
Flow Architecture
The solution included:
- After-save Record-Triggered Flow.
- Decision elements to evaluate approval criteria.
- Get Records to retrieve approval settings.
- Create Records to generate approval tasks.
- Action elements to send notifications.
- Apex Action for complex calculations.
- Fault paths for centralized error handling.
Challenges
Duplicate Automation
Users frequently edited Opportunities multiple times, causing duplicate tasks and approval requests.
Solution: Added entry criteria and status checks to ensure the Flow executed only when relevant fields changed.
Governor Limits
Some Opportunities were updated in bulk through integrations.
Solution: Moved heavy processing into Queueable Apex to avoid synchronous governor limit issues.
Error Handling
Failures in downstream integrations could interrupt the process.
Solution: Implemented fault paths in the Flow and centralized exception logging in Apex.
Result
The automation eliminated manual approval emails, reduced approval turnaround time, improved compliance, and allowed administrators to maintain most of the process without changing Apex code.
Interview Tip
A strong answer should include:
- Business requirement
- Why Flow or Apex was selected
- Design approach
- Challenges
- Solutions
- Business outcome
3. How do you prevent Mixed DML errors in Salesforce?
Answer
Mixed DML errors occur when Salesforce attempts to perform DML operations on setup objects and non-setup objects within the same transaction.
Examples of setup objects include:
- User
- UserRole
- Group
- PermissionSetAssignment
- QueueSObject
Examples of non-setup objects include:
- Account
- Contact
- Opportunity
- Case
Salesforce separates these operations to maintain system integrity.
Example Scenario
Suppose a new employee joins the company.
The business process requires:
- Create a User.
- Create an Account.
- Assign a Permission Set.
- Create onboarding Tasks.
If all of these operations occur within a single transaction, Salesforce throws a Mixed DML error.
Strategy 1: Use Asynchronous Processing
The most common solution is to separate setup and non-setup operations by moving one set of actions into an asynchronous process.
Options include:
- Future Apex
- Queueable Apex
- Scheduled Apex
This creates a new transaction and avoids the Mixed DML restriction.
Strategy 2: Platform Events
In event-driven architectures, I publish a Platform Event after completing the first transaction.
A subscriber processes the remaining setup or non-setup operations in a separate transaction.
Strategy 3: Flow Scheduled Paths
When using Record-Triggered Flows, Scheduled Paths can delay part of the automation so it executes in a separate transaction, preventing Mixed DML errors.
Strategy 4: Separate Business Processes
Where possible, split user provisioning from business data creation.
For example:
- HR creates the User.
- A subsequent automation creates business records.
This simplifies maintenance and reduces transaction complexity.
Real Example
In one project, creating a User automatically generated onboarding records and assigned Permission Sets.
The original implementation failed with Mixed DML errors.
We redesigned the process:
- User record created.
- Queueable Apex executed asynchronously.
- Permission Set Assignment completed.
- Business records created in the appropriate transaction.
The process became reliable and scalable.
Interview Tip
Remember:
Setup Objects + Non-Setup Objects = Mixed DML
The standard solution is to separate the operations into different transactions using asynchronous processing.
4. What are Platform Events, and when would you use them?
Answer
Platform Events are part of Salesforce’s event-driven architecture. They allow different applications and processes to communicate asynchronously by publishing and subscribing to events.
Instead of one system directly calling another, a system publishes an event. Any interested subscriber can react to that event independently.
This approach reduces system coupling and improves scalability.
How Platform Events Work
- A business event occurs.
- Salesforce publishes a Platform Event.
- Subscribers receive the event.
- Each subscriber performs its own processing.
Multiple subscribers can process the same event without affecting one another.
Common Use Cases
- Integrating Salesforce with ERP systems.
- Sending events to external applications.
- Triggering asynchronous business processes.
- Microservice communication.
- Real-time notifications.
- Decoupling complex integrations.
Real Project Example
Whenever an Opportunity was marked Closed Won, several downstream actions were required:
- Notify the ERP system.
- Create an invoice.
- Update the inventory application.
- Notify the Finance team.
- Send a confirmation email.
Instead of making multiple synchronous API calls, Salesforce published a Platform Event.
Each downstream system subscribed to the event and processed its own task independently.
This improved reliability and reduced the impact of failures in any single downstream system.
Advantages
- Asynchronous processing
- Loose coupling
- Better scalability
- Multiple subscribers
- Improved fault isolation
- Easier integration with external systems
Challenges
Platform Events provide at-least-once delivery, so subscribers should be designed to handle duplicate events gracefully by implementing idempotency checks.
Monitoring event processing is also important to detect and resolve failures.
Interview Tip
A concise explanation:
“Platform Events enable event-driven communication between Salesforce and other systems by allowing publishers and subscribers to exchange business events asynchronously.”
5. Describe your CI/CD process for Salesforce deployments.
Answer
Continuous Integration and Continuous Deployment (CI/CD) help deliver Salesforce changes quickly, consistently, and with fewer production issues.
In enterprise projects, I use Git-based source control combined with automated validation and deployment pipelines.
Step 1: Source Control
Every developer works on a separate feature branch.
Example:
main

↓

develop

↓

feature/account-enhancement

↓

feature/new-lwc

↓

bugfix/opportunity-validation
Changes are committed regularly with meaningful commit messages.
Step 2: Pull Request
Once development is complete:
- Create a Pull Request.
- Perform peer review.
- Resolve review comments.
- Merge into the integration branch.
Code reviews help maintain quality and consistency.
Step 3: Continuous Integration
Whenever code is merged:
The CI pipeline automatically performs:
- Metadata validation
- Static code analysis
- Apex test execution
- Code coverage verification
- Deployment validation
Only successful builds proceed further.
Step 4: Deployment to Integration and UAT
Validated metadata is deployed automatically to Integration and later to UAT environments.
Business users perform User Acceptance Testing before production approval.
Step 5: Production Deployment
After approval:
- Deploy during the release window.
- Execute smoke tests.
- Validate integrations.
- Verify reports and scheduled jobs.
- Monitor production logs.
Tools Used
Common tools include:
- Git
- Salesforce DX
- Azure DevOps
- GitHub Actions
- Copado
- Gearset
- Jenkins
The specific tool depends on the organization’s DevOps strategy.
Real Project Example
In a multi-developer project, manual deployments often caused metadata conflicts and missed dependencies.
We implemented a CI/CD pipeline using Git, Salesforce DX, and Azure DevOps.
The pipeline automatically validated metadata, executed Apex tests, and deployed approved changes through Integration, UAT, and Production.
This reduced deployment time, improved release quality, and significantly decreased production incidents.
Interview Tip
A complete CI/CD answer should cover:
- Source Control
- Branching Strategy
- Code Review
- Automated Testing
- Continuous Integration
- Continuous Deployment
- Production Validation
- Monitoring
Accenture Salesforce Interview – Top 5 Questions with Detailed Answers (3–8 Years Experience)
1. How do you manage multiple integrations in a Salesforce enterprise application?
Answer
In enterprise Salesforce implementations, it’s common to integrate Salesforce with multiple external systems such as ERP, SAP, payment gateways, marketing platforms, data warehouses, HR systems, and customer support applications. Managing these integrations requires careful planning, scalable architecture, robust error handling, and continuous monitoring.
In one project, Salesforce was integrated with SAP for order processing, a payment gateway for invoice payments, an HR system for employee synchronization, and a marketing platform for campaign management. The challenge was ensuring all integrations worked reliably without impacting Salesforce performance.
Step 1: Understand Business Requirements
Before starting development, I identify:
- Which systems need to communicate
- What data needs to be exchanged
- Real-time vs batch requirements
- Expected transaction volume
- Security and compliance requirements
- Error recovery expectations
This helps determine the most suitable integration pattern.
Step 2: Choose the Right Integration Pattern
Different business scenarios require different integration approaches.
Synchronous Integration
Used when users need an immediate response.
Examples:
- Tax calculation
- Credit verification
- Payment authorization
Technologies:
- REST API
- SOAP API
Asynchronous Integration
Used when immediate responses are not required.
Examples:
- Order synchronization
- Invoice generation
- Customer notifications
Technologies:
- Platform Events
- Queueable Apex
- Batch Apex
- Change Data Capture
Asynchronous processing improves scalability and user experience.
Step 3: Secure Integrations
Security is critical.
I use:
- Named Credentials
- OAuth 2.0
- JWT Authentication
- Mutual TLS (when required)
- Encrypted communication over HTTPS
Named Credentials simplify authentication and token management.
Step 4: Separate Integration Logic
Instead of placing API calls directly in triggers or flows, I follow a layered architecture:
Trigger / Flow

↓

Service Layer

↓

Integration Layer

↓

REST Client

↓

External System
This keeps business logic modular, reusable, and easier to maintain.
Step 5: Error Handling
External systems can fail due to:
- Network issues
- Authentication failures
- API timeouts
- Invalid payloads
My approach includes:
- Try-catch blocks
- Custom Integration Log object
- Request and response logging
- Retry mechanism using Queueable or Scheduled Apex
- Email alerts for critical failures
Step 6: Monitoring
Enterprise integrations require continuous monitoring.
I monitor:
- Apex Jobs
- Failed Platform Events
- Scheduled Jobs
- Integration Logs
- API response times
- Governor limits
Dashboards help identify issues proactively.
Real Project Example
A manufacturing company had Salesforce integrated with:
- SAP
- Payment Gateway
- Logistics System
- Marketing Cloud
Whenever an Opportunity reached Closed Won:
- Salesforce published a Platform Event.
- SAP created an order.
- Logistics generated shipment details.
- Finance created an invoice.
- Marketing sent a welcome campaign.
Each system processed the event independently, reducing dependencies and improving scalability.
Challenges
API Rate Limits
The ERP system limited API requests.
Solution: Used Queueable Apex with throttling and retry logic.
Duplicate Transactions
Users occasionally saved the same Opportunity multiple times.
Solution: Implemented idempotency checks using external transaction IDs.
Temporary Failures
Some downstream services were unavailable.
Solution: Logged failures and retried automatically using Scheduled Apex.
Result
The architecture supported thousands of daily transactions while maintaining reliability, reducing manual intervention, and providing complete visibility into integration failures.
Interview Tip
A strong answer should cover:
- Business requirement
- Integration pattern
- Security
- Architecture
- Error handling
- Monitoring
- Scalability
- Business outcome
2. Explain the Salesforce Order of Execution with a real-world example.
Answer
The Salesforce Order of Execution is the sequence of events Salesforce follows whenever a record is created, updated, or deleted. Understanding this process is essential because it explains how validation rules, flows, triggers, workflows, processes, and other automations interact.
A clear understanding helps prevent recursion, unexpected updates, and automation conflicts.
Typical Order of Execution
When a record is saved, Salesforce generally performs the following steps:
- Loads the existing record (for updates).
- Applies system validations.
- Executes before-save Record-Triggered Flows.
- Executes before triggers.
- Performs custom validation rules.
- Saves the record (not yet committed).
- Executes after triggers.
- Executes after-save Record-Triggered Flows.
- Executes Assignment Rules (where applicable).
- Executes Auto-Response Rules.
- Executes Escalation Rules (where applicable).
- Evaluates Roll-Up Summary calculations.
- Recalculates sharing if necessary.
- Commits the transaction.
- Executes post-commit logic such as asynchronous Apex, Platform Events, and email notifications.
Real-World Example
Consider an Opportunity update.
Business Requirement
When an Opportunity is moved to Closed Won, the system should:
- Validate mandatory fields.
- Update related Account information.
- Create an Order.
- Notify Finance.
- Send data to an ERP system.
What Happens
- User updates the Opportunity.
- Before-save Flow calculates derived values.
- Before Trigger performs additional validations.
- Validation Rules ensure required information is present.
- Salesforce saves the Opportunity.
- After Trigger creates related records.
- After-save Flow sends approval notifications.
- Platform Event is published.
- Queueable Apex sends data to the ERP.
- Email notifications are sent after the transaction commits.
This sequence ensures all business processes occur in the correct order without blocking the user’s save operation unnecessarily.
Common Issues
Developers sometimes encounter:
- Trigger recursion
- Duplicate Flow execution
- Mixed DML errors
- Governor limit exceptions
- Duplicate integrations
These issues can usually be resolved by understanding the Order of Execution and designing automations accordingly.
Interview Tip
Instead of memorizing every step, explain:
- Before-save Flow
- Before Trigger
- Validation Rules
- Save
- After Trigger
- After-save Flow
- Commit
- Asynchronous Processing
Then support your explanation with a practical example.
3. How would you migrate a large volume of data while maintaining data integrity?
Answer
Migrating large volumes of data is a critical activity in Salesforce implementations. The objective is not only to move data successfully but also to preserve relationships, avoid duplicates, and ensure the migrated data remains accurate and usable.
Step 1: Analyze Source Data
Before migration, I review:
- Data quality
- Duplicate records
- Missing mandatory fields
- Invalid values
- Relationship mappings
Cleaning data before migration significantly reduces failures.
Step 2: Define the Migration Strategy
Typical migration sequence:
- Users
- Accounts
- Contacts
- Products
- Opportunities
- Cases
- Custom Objects
Parent records are always migrated before child records to preserve relationships.
Step 3: Prepare Data
Activities include:
- Standardizing formats
- Removing duplicates
- Validating mandatory fields
- Creating External IDs for relationship mapping
- Mapping legacy values to Salesforce picklists
Step 4: Choose the Right Tool
The choice depends on data volume.
Common tools:
- Data Import Wizard (small volumes)
- Data Loader
- Bulk API
- ETL tools such as MuleSoft, Informatica, or Talend
For millions of records, Bulk API is typically the preferred option.
Step 5: Validate Relationships
After migration, verify:
- Parent-child relationships
- Lookup fields
- Master-detail relationships
- Ownership
- Record Types
Maintaining relationships is essential for application functionality.
Step 6: Perform Reconciliation
Compare source and target systems.
Typical checks include:
- Record counts
- Field values
- Related records
- Reports
- Random sampling
This confirms migration accuracy.
Real Project Example
A healthcare organization migrated over 5 million customer records into Salesforce.
Challenges included duplicate contacts, inconsistent addresses, and complex Account-Contact relationships.
Solutions:
- Data cleansing before migration.
- External IDs for relationship mapping.
- Bulk API for high-volume loading.
- Automated reconciliation reports after migration.
The migration completed successfully with minimal business disruption.
Interview Tip
Explain migration in this order:
- Data Analysis
- Data Cleansing
- Mapping
- Migration Tool
- Validation
- Reconciliation
- Business Sign-off
4. What are the best practices for Lightning Web Component (LWC) development?
Answer
Lightning Web Components should be designed for performance, maintainability, reusability, and security. Following best practices ensures applications remain efficient as business requirements evolve.
Component Design
Build components with a single responsibility.
Smaller, focused components are easier to understand, reuse, and test.
Server Communication
- Use
@wirefor reactive read operations. - Mark read-only Apex methods as
@AuraEnabled(cacheable=true). - Retrieve only the fields required.
- Minimize the number of server calls.
Performance
Improve user experience by:
- Implementing lazy loading.
- Using pagination or infinite scrolling.
- Reducing unnecessary re-rendering.
- Displaying loading indicators during server calls.
JavaScript
Keep JavaScript clean and modular.
Avoid:
- Large methods
- Duplicate logic
- Unnecessary loops
Prefer reusable helper functions and efficient data structures such as Maps and Sets where appropriate.
Security
Respect Salesforce security by:
- Enforcing CRUD and Field-Level Security in Apex.
- Avoiding exposure of sensitive information.
- Validating all user input.
- Preventing injection vulnerabilities.
User Experience
Provide:
- Clear validation messages.
- Responsive layouts.
- Meaningful loading states.
- Accessible components following Lightning Design System guidelines.
Testing
Test:
- Different user profiles.
- Various screen sizes.
- Error scenarios.
- Large datasets.
- Browser compatibility.
Real Project Example
A dashboard component originally loaded all related records during initialization, resulting in slow page performance.
We optimized it by:
- Loading only summary information initially.
- Fetching detailed records on demand.
- Using cacheable Apex methods.
- Reducing unnecessary server requests.
The page became significantly faster and provided a better user experience.
Interview Tip
Remember these key principles:
- Reusable Components
- Cacheable Apex
- Lazy Loading
- Minimal Server Calls
- Security
- Performance
- Accessibility
5. Describe a production issue you resolved and the steps you followed to identify the root cause.
Answer
One production issue I resolved involved Opportunity records failing to synchronize with an external ERP system after users marked them as Closed Won.
The issue affected order creation and required immediate investigation because it impacted business operations.
Step 1: Understand the Problem
I gathered information from users:
- When did the issue start?
- Which records were affected?
- Was the problem intermittent or consistent?
- Were any recent deployments completed?
This helped narrow the investigation.
Step 2: Review Logs
I examined:
- Debug Logs
- Apex Jobs
- Scheduled Jobs
- Integration Logs
- Platform Event monitoring
- API response logs
The logs showed repeated HTTP 500 responses from the ERP system.
Step 3: Isolate the Root Cause
Further analysis revealed that a recent ERP API update introduced a new mandatory field that Salesforce was not sending in the request payload.
As a result, the ERP rejected every request.
Step 4: Implement the Fix
The solution included:
- Updating the payload to include the required field.
- Adding validation before making the callout.
- Improving exception handling.
- Enhancing integration logging to capture detailed API responses.
Step 5: Validate
The fix was tested in:
- Developer Sandbox
- Integration Environment
- UAT
After successful validation, it was deployed during the next production release window.
Step 6: Prevent Future Issues
To reduce the risk of similar incidents, we:
- Added automated integration tests.
- Introduced API contract validation.
- Improved monitoring dashboards.
- Created alerts for repeated integration failures.
- Documented the dependency with the ERP team.
Result
The synchronization process was restored, order creation resumed successfully, and the improved monitoring allowed the support team to identify future issues much more quickly.
Interview Tip
Structure production issue answers using this framework:
- Business impact
- Investigation
- Root cause analysis
- Solution
- Testing
- Deployment
- Preventive improvements
- Business outcome
📚 Best Salesforce Interview Preparation Resources (2026)
Trusted by 2000+ learners preparing for Salesforce interviews
🔗 1–4 Years Experience (Juniors & Freshers)
👉 https://trailheadtitanshub.com/100-real-salesforce-scenario-based-interview-questions-2025-edition-for-1-4-years-experience/
🔗 4–8 Years Experience (Mid / Senior Roles)
👉 https://trailheadtitanshub.com/100-real-time-salesforce-scenario-based-interview-questions-2025-edition-for-4-8-years-experience/
🔗 Mixed Roles (Admin + Apex + SOQL + LWC + Integration)
👉 https://trailheadtitanshub.com/100-real-time-salesforce-interview-questions-scenarios-2025-edition-admin-apex-soql-lwc-vf-integration/
🚀 Mega Interview Pack — 2000+ Recruiter Questions
👉 https://trailheadtitanshub.com/salesforce-interview-mega-pack-600-real-questions-from-recruiter-calls-with-my-best-performing-answers/
💼 1000+ Real Dev/Admin Interview Q&A (Infosys, EY, Dell, TCS)
👉 https://trailheadtitanshub.com/500-real-interview-questions-answers-from-top-tech-companies-ey-infosys-tcs-dell-salesforce-more/
🔥 34-Day Salesforce Interview Battle Plan
👉 https://trailheadtitanshub.com/crack-the-interview-real-questions-real-struggles-my-students-34-day-journey/
💡 If you’re preparing for Salesforce Developer or Admin interviews in 2026, these resources can help you practice real interview questions asked by recruiters.